RAMDisk is a kind of storage that uses a portion of RAM storage capacity to store files. Although the ramdisk provides a huge speed improvements over HDD and even SSDs, but the main problem is all the files inside the ramdisk will disappear when you turn off your PC or even unexpected shutdown happens. The usage of ramdisk is mainly for speeding up the caching process and also used for making video rendering process much faster.
To set up the ramdisk, you will need to create a directory in the folder /mnt/ramdisk and also set the permission to allow full access:
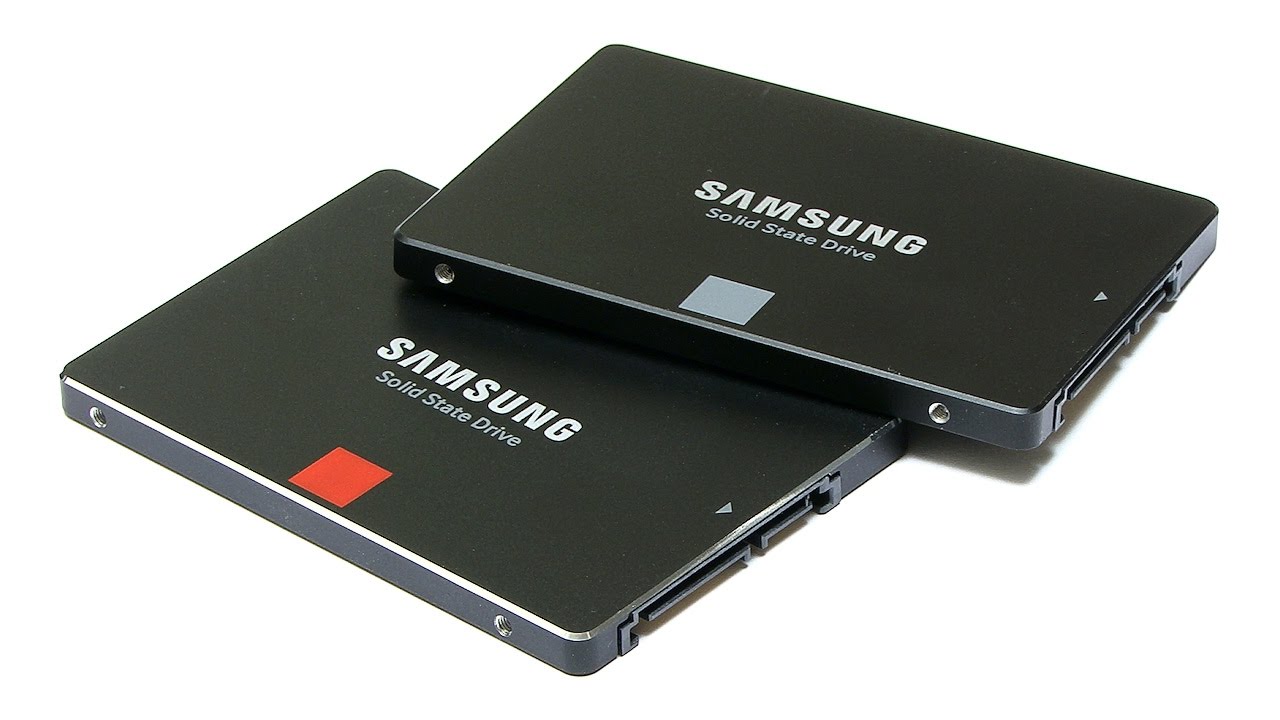
Solid State Drives or SSD are evolving rapidly since past years. Back then, it was pretty expensive yet have shorter lifespan although it can boot your PC with such blazing speeds. Nowadays, the SSD lifespan got better and there are also some technological advancement of flash storage technology which allows people to afford it with such bargain price. In the SSD market, there are many types of SSD drives but the very common SSD drives are either from SATA interface or M.2 interface. So, let's talk about the comparison between these type of SSD drives.
Well, DXVK is a Vulkan-based translation layer for Direct3D 10/11 which allows running 3D applications on Linux using Wine. DXVK also works on Windows 10 as well and the project is still in development phase, so expect more bugs, errors and crashes!
Prequisites
Before you want to install DXVK, make sure that your PC meets the requirements below:
For Linux
1. A PC/laptop with dedicated GPU card, mainly from AMD/Nvidia with non-free drivers installed. Open source drivers may not work.
2. Latest version of Linux desktop, at least linux version 4.10+
3. Latest WINE staging version only, DXVK will not work on stable builds.
For Windows
1. A PC/laptop with dedicated GPU card, mainly from AMD/Nvidia with latest driver version.
2. Updated version of Windows (at least Windows 7 and above)
Installation Steps
A. For Linux desktop OS
1. Install WINE staging version first, the package should be labelled as wine-staging.
3. Extract DXVK archive file and copy all .dll files into game directory where the executable sits. You will need to copy it according to the CPU architecture type, either 32-bit or 64-bit.
4. Run winecfg and you will required to add the DXVK dll. library files to override it and set all of it as "Native" only.
5. Before running the game, you might want to see the DXVK HUD that clearly verifies that the game is run with DXVK. To do it, just type it below in the terminal:
$ export DXVK_HUD=1
$ wine mygame.exe
or
$ export DXVK_HUD=devinfo,fps
$ wine mygame.exe
or
$ DXVK_HUD=devinfo,fps wine mygame.exe
If you're using steam, just run the command below:
6. When the game runs, you will see the DXVK HUD displayed on the top left of the screen. Verify the implementation of DXVK by checking at both [game]_d3d11.log and [game]_dxgi.log text files.
3. Extract DXVK archive file and copy all .dll files into game directory where the executable sits. You will need to copy it according to the CPU architecture type, either 32-bit or 64-bit.
4. Launch the game. Verify the implementation of DXVK by checking at both [game]_d3d11.log and [game]_dxgi.log text files.
There are many various ways on using wired headphones on PS3 console, a ton of them. But sometimes its approach can be too messy to implement so I am share something that can make it easier for you to configure wired headphones on PS3 console.
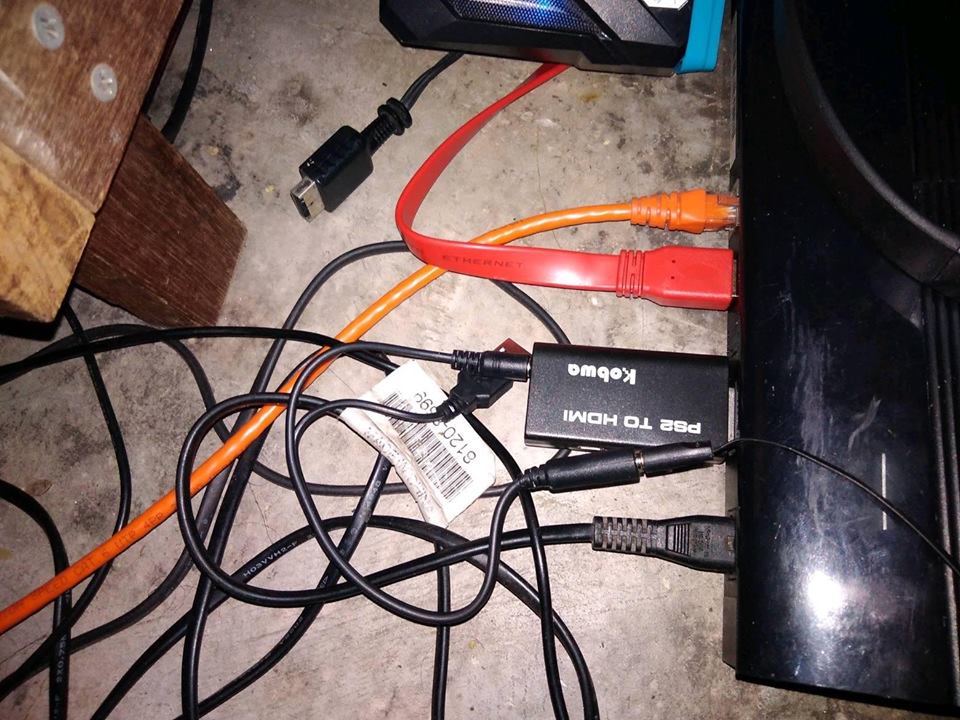
Boys and girls, meet the handy tool, the PS2 HDMI adapter...You can use PS2 HDMI adapter to connect headphone jack into your PS3 console. No extra mini USB cable needed, just plug and play as usual but you will need to something in order to make it work.
What you need is:
1. A headphone with adjustable volume lever.
2. A PS2 HDMI adapter.
3. Headphone jack extender cable.
Here's how to do it:
1. Unplug the power cable from the console.
2. Insert headphone jack into the PS2 HDMI adapter.
3. Insert PS2 HDMI adapter unit into the legacy AV port. No additional mini USB cable required.
4. Plug in the power cable and boot it up.
5. Set up audio output by go to [Settings>Sound Settings>Audio Output Settings] and select Audio Output Connector/SCART/AV MULTI.
6. Done. Enjoy it with your headphones on...
Yesterday, I wrote about this article but the problem is my PS4 can't get to connect to the internet via LAN cable with my PC on the next day and it requires to do the setup all over again in order to getting back to online. Now I'm too damn lazy to do it back again from start so I have to use an easy hotspot app, Connectify to getting my PS4 back online, easy as it is.
Before that, make sure that you have all of these:
1. A LAN cable connected with both PC and PS4.
2. Connectify app with PRO/MAX license. (NEVER ASK ME WHERE TO GET A PIRATED VERSION!!!)
3. An adequate time to do it.
4. A working functional brain.
Here's how to do it:
1. Configure your network settings in Windows by turning off Internet Sharing Settings or even remove the bridge network. Also, the IPv4 settings and its DNS should be remain blank and set to detect automatically. Reboot your PC after that.
2. Install Connectify app and activate the PRO/MAX license. If you're using free version, it never work either. (DO NOT ASK ME FOR PIRATED/CRACKED VERSION!!!).
3. Set up the wired router in Connectify app (see picrture below). If you're using PRO version, you only permitted to use "Routed" mode in Network Access option while MAX license can able to use Bridged mode which is most recommended. Also, set Internet to Share to the wifi network that you are currently used and when you are finishing setup, click Start Hotspot.
4. Go to your PS4 and go to [Settings > Network > Set Up Internet Connection > Use a Lan Cable> Easy] and your console will connect to your PC automatically. 5. If the connection is successful then you can enjoy using it. NOTE: If you're using Routed mode in Connectify app wired router, you might see some warning text below during connection testing in PS4 like this: "Your router does not support IP Packet Fragmentation...". This is because of Connectify app config itself and it is strongly requires you to use Bridged mode only if you have MAX license on your Connectify app. You can still use it, however there will be some limitations of access during using the Routed config in Connectify app.
Before that I had been searching for exact guide on how to connect these 2 devices with a single LAN cable and most of it are just half-baked guide with no exact explanation and even possibly throwing some errors after doing that. Now I'm gonna write this stuff so everyone can get the right guide on how to set it up.
Well...let's get started!
Before you want to set up PC-PS4 connection over a single LAN cable, make sure that you have:
1. A PC and a PS4 console. Both devices must be connected with LAN cable first!
2. A wifi connection on your PC.
3. A LAN Cable (any kind of LAN cable, best performance use Cat 6 cable or better)
4. An adequate time to do it.
5. A working functional brain.
Here's how to do it:
1. First of all, open up [Network & Internet Settings>Change Adapter Options] in Windows OS to make changes of the adapter. Then, right-click the wifi adapter which is your primary connection that used to connect to the internet and click Properties. Then, go to Sharing tab and enable Internet Connection Sharing as shown on the picture below:
Also, make sure that you are selecting the right adapter name by selecting the LAN adapter name if the box with adapter name appears when you have multiple LAN or/with VPN connections carries virtual LAN adapters.
2. Right-click the LAN adapter and click Properties and select [Internet Protocol Version 4 (IPv4) > Properties]. You will need to enter the IP address like this below:
3. Then, boot up your PS4 and go to [Settings > Network > Set Up Internet Connection > Use a Lan Cable> Custom] and select IP Address Settings to Manual. Then, input IP address as shown on the picture below:
Then, other settings should be followed as below:
> MTU Settings : Automatic
> Proxy Server : Do Not Use
After that, perform internet connection test to check whether your PS4 is connected to your PC. If the test is success then congratulations...you have set up the PS4-PC connection via the LAN cable. Now you can use it for using it with Remote Play app or something else.
Note: If you found some difficulties of reconnecting it back on the second day after that, you might need to reconfigure it all again from the start or just follow this guide here instead.